

Learn How to Integrate ChatGPT API with Laravel 11: A Step-by-Step Guide with this comprehensive step-by-step guide. Boost your app’s AI capabilities and enhance user interaction using OpenAI’s powerful API.
What is ChatGPT/OpenAI?
ChatGPT is an advanced language model developed by OpenAI, based on the GPT-4 architecture (as of 2023). It is designed to understand and generate human-like text based on the input it receives. GPT stands for “Generative Pre-trained Transformer,” which is a deep learning model that processes and generates natural language using vast amounts of text data. You Can Learn Laravel 11 RouteServiceProvider Configuration Example
Here’s a breakdown:
- ChatGPT: A conversational AI tool built upon OpenAI’s GPT models, used to simulate conversations and assist with tasks such as answering questions, writing content, debugging code, and much more. It powers interactive applications and chatbots across many industries, offering human-like responses based on contextual understanding.
- OpenAI: A research organization focused on creating and promoting friendly AI that benefits humanity. OpenAI develops advanced AI models like GPT, Codex, and DALL·E, which have widespread applications in industries ranging from customer service to creative content generation, and more.
Key Features of ChatGPT/OpenAI:
- Natural language understanding and generation.
- Customizable API integration for apps, websites, and platforms.
- Multi-domain knowledge base, capable of answering queries on a broad range of topics.
- Used in various fields like content creation, programming assistance, educational tools, and automation.
OpenAI’s mission is to ensure that artificial general intelligence (AGI) benefits all of humanity.
How to Integrate ChatGPT API with Laravel 11: A Step-by-Step Guide
- Step 1: Install Laravel
- Step 2: Install openai-php/laravel Package
- Step 3: Create OpenAI Account
- Step 4: Create Route
- Step 5: Create Controller
- Step 6: Create Blade File
- Run Laravel App
Step 1: Install Laravel
To begin, we must obtain the latest version of the Laravel application by executing the command stated below. Open your terminal or command prompt and enter the given command.
composer create-project laravel/laravel example-appStep 2: Install openai-php/laravel Package
In this step, we need to install openai-php/laravel composer package to use OpenAI API. so let’s run bellow command:
composer require openai-php/laravelNow, we will publish configuration file using the following command:
php artisan vendor:publish --provider="OpenAI\Laravel\ServiceProvider"Step 3: Create OpenAI Account
First you need to create Account on OpenAI website.
1. Go to https://platform.openai.com/ you can register there you will get free access $18 credit for next three months.
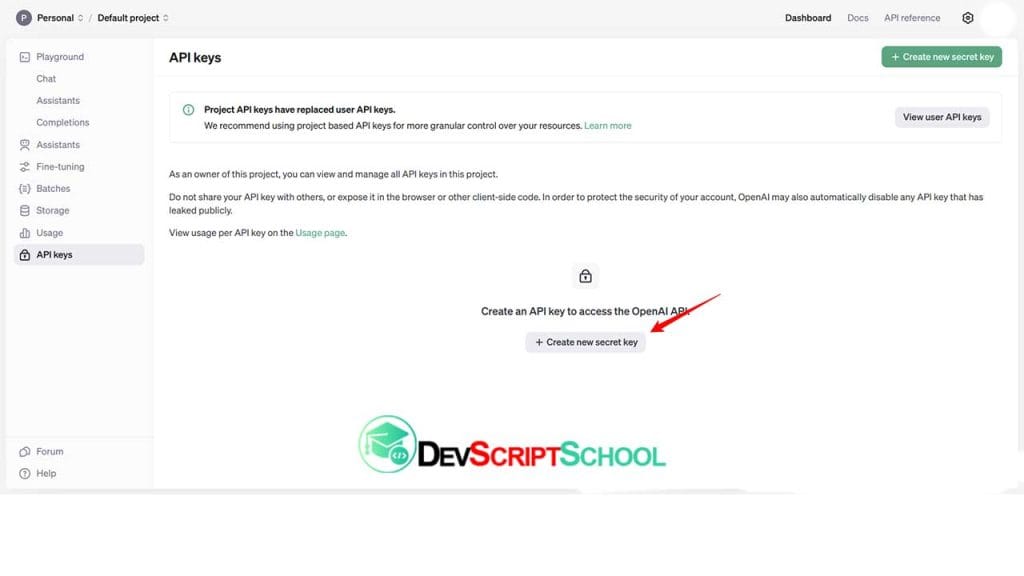
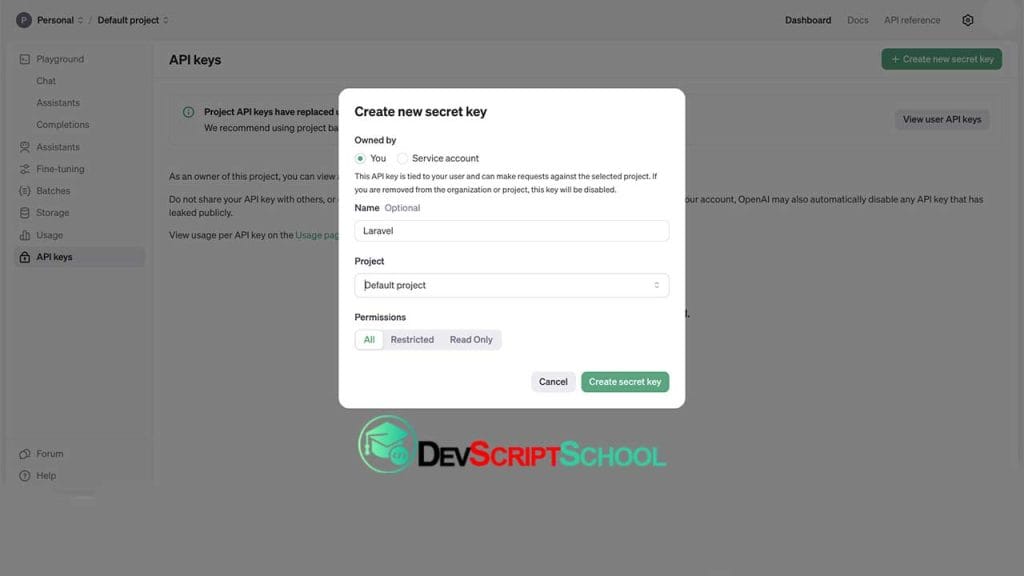
2. After that go to https://platform.openai.com/account/api-keys and generate the API token.
You can follow the below screenshots:
This screenshot, you need to copy API key and add on your .env file as like the below:
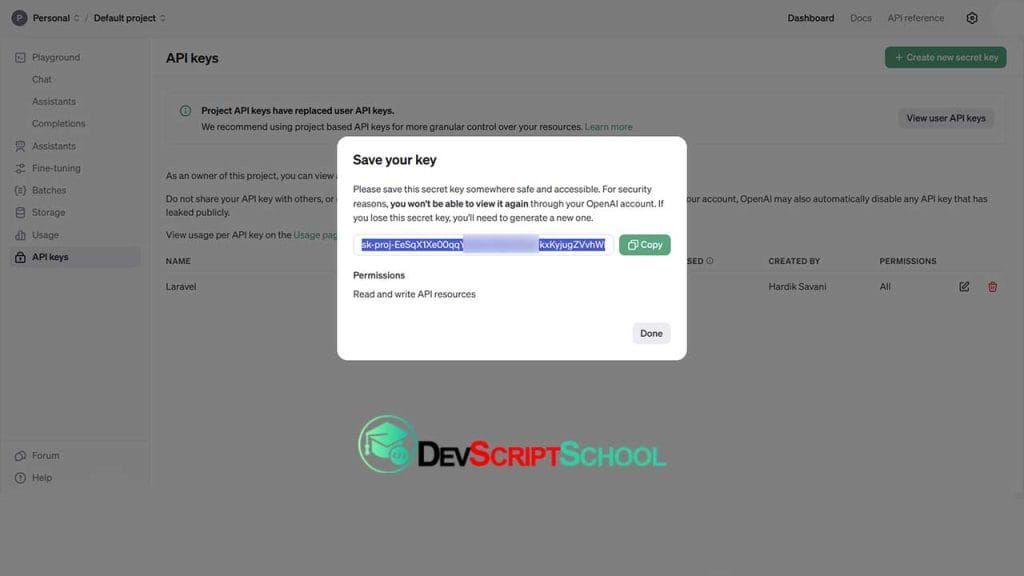
Then add your API KEY to .env file:
.env
OPENAI_API_KEY=api_key...Step 4: Create Route
now we will create one route for calling our example, so let’s add new route to web.php file as bellow:
routes/web.php
<?php

use Illuminate\Support\Facades\Route;

use App\Http\Controllers\ChatGPTController;

Route::get('/chat-gpt', [ChatGPTController::class, 'index'])->name('chat-gpt.index');
Step 5: Create Controller
in this step, we will create ChatGPTController and write payment logic, so let’s add new route to web.php file as bellow:
app/Http/Controllers/ChatGPTController.php
<?php

namespace App\Http\Controllers;

use Illuminate\Http\Request;
use Illuminate\Support\Arr;
use OpenAI\Laravel\Facades\OpenAI;

class ChatGPTController extends Controller
{
    /**
     * Write code on Method
     *
     * @return response()
     */
    public function index(Request $request)
    {
        $result = '';

        if ($request->filled('title')) {
            $messages = [
                ['role' => 'user', 'content' => 'suggest me 5 domain names from "'.$request->title.'" topic. simply give me domain names list with 1. 2. 3. 4. 5. '],
            ];

            $result = OpenAI::chat()->create([
                'model' => 'gpt-3.5-turbo',
                'messages' => $messages,
            ]);

            $result = Arr::get($result, 'choices.0.message')['content'] ?? '';
        }

        return view('chatGPT', compact('result'));

    }
}
Step 6: Create Blade File
here, we need to create chatGPT.blade.php file and update following code on it.
resources/views/auth/chatGPT.blade.php
<!DOCTYPE html>
<html>
<head>
    <title>Laravel 11 Integrate Chat GPT API Example - ItSolutionStuff.com</title>
    <link href="https://cdn.jsdelivr.net/npm/[email protected]/dist/css/bootstrap.min.css" rel="stylesheet" crossorigin="anonymous">
</head>

<body>
    <div class="container">
        <div class="card mt-5">
            <h3 class="card-header p-3">Laravel 11 Integrate Chat GPT API Example - ItSolutionStuff.com</h3>
            <div class="card-body">
                <form method="GET" action="{{ route('chat-gpt.index') }}">
                    <div class="form-group">
                        <label><strong>Give me your title, I will provide you domains list.</strong></label>
                        <input type="text" name="title" class="form-control" />
                    </div>
                    <div class="form-group mt-2">
                        <button type="submit" class="btn btn-success">Submit</button>
                    </div>
                </form>

                @if(!empty($result))
                    <div class="mt-5">
                        <strong>Result:</strong><br/>
                        {!! nl2br($result) !!}
                    </div>
                @endif

            </div>
        </div>
    </div>
</body>
</html>
Run Laravel App:
All the required steps have been done, now you have to type the given below command and hit enter to run the Laravel app
php artisan serveNow, Go to your web browser, type the given URL and view the app output:
http://localhost:8000/chat-gptNow, you will see the following output:
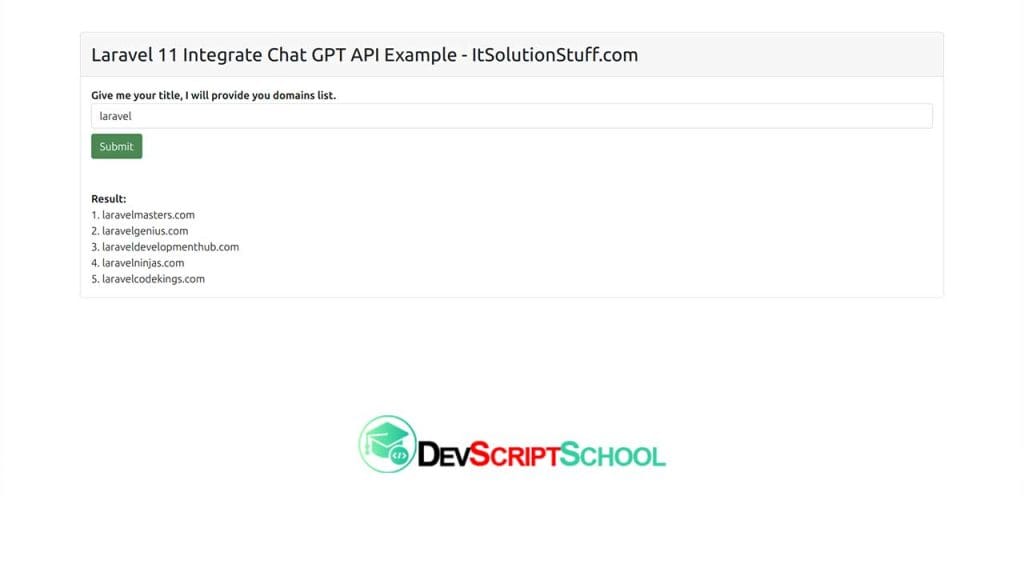
Now, it’s done…
I hope it can help you…


Pingback: How To Create Comment System In Laravel 11 | DevScriptSchool.com
Pingback: How To Integrate Google Spreadsheet In Laravel 11 | DevScriptSchool.com
Pingback: How To Send WhatsApp Messages With Laravel 11? | DevScriptSchool.com